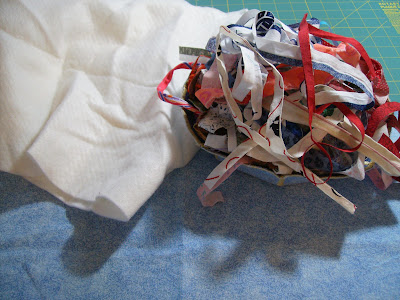
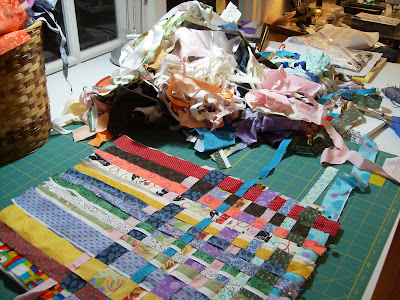
I start with a scrap piece of fabric for the backing, 2 pieces of Warm Cotton batting (double thickness) and lots of scraps. If you are making potholders, be sure and use the proper batting for that; otherwise . . . OUCH!!
The backing is laid wrong side up and the 2 pieces of batting are laid on top. Next just pull strips from your pile of scraps and lay across the backing and batting. The strips are not of equal size or width as I like the "scrappiness" of the look. Feel free to trim everything to an even size if you're so inclined.
Once the first layer is down I trim the excess to make the weaving go smoother.
This is what it looks like before I start the weaving process.
Here are the first two rows of the weave (over/under). I pin down the first row to make sure that the strips stay in place.
Here I am weaving a row.
Smoothing out the rows.
Halfway there . . .
Another view of what it looks like while weaving.
Lots of scraps to choose from. I know, what a beautiful mess, huh?!!
More of the same (is this too much??!!)
Getting the piece ready for zigzag.
I don't try to match thread at all. I pick two different colors (one for the top; one for the bobbin) and I try to use up thread that doesn't have enough for another project. (I should take a picture of all of the empty spools I've managed to use up!!)
I use a fairly large zigzag stitch and I go up and down each row. At the bottom, I turn and zigzag the end only to the start of the next row and then turn, sew and repeat. I do all zigzagging in one direction and then turn and go the opposite direction (i.e, all vertical and then all horizontal rows, or vice versa). I do this all in one step and never stop unless I run out of thread. It goes really quickly this way.
And we're off . . . hey, I earned everyone of those wrinkles!!
If you look closely, you can see that I have only stitched in one direction. The horizontal rows are complete and now I'm sewing the vertical rows.
Perhaps this is a better view. You can see on the right side of this piece that both horizontal and vertical rows have been stitched.
Here's a view of the backside after all the rows have been stitched. As I've said before, I'm not into the "perfect" look so the rows will not be even.
Piece is completely sewn.
And is trimmed to size.
Since I'm making coasters, I cut into 3 pieces that were 5" x 11" and these pieces were cut in two to make six coasters that will finish to 5" x 5 1/2".
At this point I usually do a free motion quilt design, but it is not necessary. The scraps are pretty secure with just the zigzagging. Now all you need to do is pick out some contrasting binding and voila, you now have some scrap happy coasters!!! ENJOY!!
#80
#81
#82
#83


2 comments:
Thanks so much for that tutorial - I will hopefully have a go as soon as I can after Christmas - a great fun project using up scraps and ending up with something fabulous!
Thanks for taking the time to take all the photos. Merry Christmas!
Hi Joyce,
About the wreath - I don't think you would have to starch the scraps - just tie them really close - mine is done on three metal rings in decreasing sizes and i have seen garlands made of tied fabric and they don't need starching!
Happy Christmas!
Post a Comment